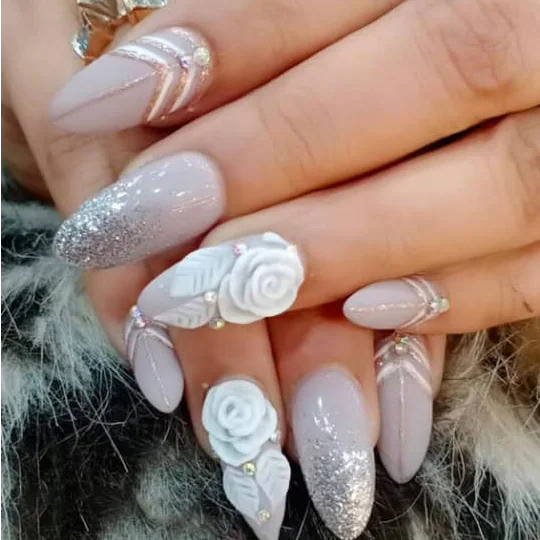
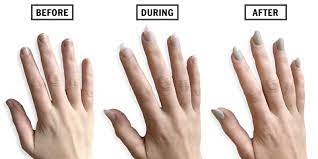
NAIL EXTENSION
Nail extensions involve the addition of an artificial tip to the tip of your nail to increase the length.The appendix is then strengthened by covering it in gel, acrylic, or fibreglass. On the other hand, the artificial nail may also be affixed over your natural nails; therefore, bypassing the usage of the nail tips.
- First thing’s first, the best nail extensions for short nails begin with the prep. In order to reveal as much of your nail as possible and create more surface area for your acrylics, start by carefully pushing your cuticles back. Removing all this dead skin from your nail plate ensures that nothing will interfere with the adhesion of the acrylic so this is a very important step.
- Next, use a sanding block or a 240 grit file to gently remove the shine from your nail, before using a nail file to lightly file down the side walls and free edge to ensure your nail is completely abrased and is a neat shape.
- Now it’s time to remove any of that pesky dust, give them a wipe down with acetone or our gel residue wipe-off solution to ensure they’re clean and ready to hold your acrylic.
- Next, prep your nails by applying our nail dehydrator and wait for this to evaporate. Once you’ve done this, apply two coats of our acid-free primer to help avoid your acrylics from lifting, if you really struggle with lifting give the acid primer a go.
- Once you’ve prepped your nails, apply a nail sculpting form. When it comes to how to use nail forms on short nails, you need to ensure it’s lined up carefully against the top of your nails, so as not to cover the hyponychium (the exposed skin just under the top edge of your fingernail). If you find the skin of your fingers gets in the way of closing your nail sculpting form to the size you want, you can very carefully snip the sides to ensure it sits closely corner-to-corner on your nails.
- Now you’re properly prepped, you’re ready to start applying your acrylic nails. Starting with a medium-sized bead, blend out your chosen colour onto your nails using an acrylic brush, starting from half-way up your natural nail. Pat and press it down along your sculpting form until it is shaped to your desired length.Taking another medium-sized bead, apply this close the cuticle of your nails and blend it out carefully over the length of each nail, thinning it out the closer you get to the tip. Don’t forget to clean your brush in between each bead, dab it in your liquid and wipe on some kitchen roll, this will ensure your acrylic applies evenly without sticking to and ruining your brush. Top Tip: when it comes to acrylic on short bitten nails, we recommend using our max-adhesion liquid in order to ensure it remains as secure as possible on the smaller surface area of your nails.
- To give our nails a C-curve and ensure a nice slim shape, we like to use a pinching tool on each nail, clamping it to the widest part of your nail when the acrylic is almost set. Pinching also gives your nail some extra strength so it’s well worth this extra step.
- Now, you’re ready to file and buff down your acrylics! To start this process, begin by first removing your sculpting form. Next, take your chosen file (the grit of the file you use depends on how much bulk is on the nail, 80 is rough and 180 is about normal) and straighten up your side walls and free edge before running over the top to de-bulk and smooth, don’t forget around your cuticle area! Once you’ve finished filing, use a white sanding block to fully smooth your nails out before dusting them down.
- To clear your nails of any residue or dust from filing, wipe them down once more using acetone, which will refine and smooth your nail surfaces even more.
- And voila, you’re done! Your former short and bitten nails should now be transformed into strong and sturdy acrylics, ready for applying nail polish colours to or getting creative with nail art designs. Now you know how to apply acrylic nails on short bitten nails, you can make struggling with miniature manicures a thing of the past! Simply repeat these easy steps and you can fix short bitten nails and enjoy long and beautiful acrylics every time.
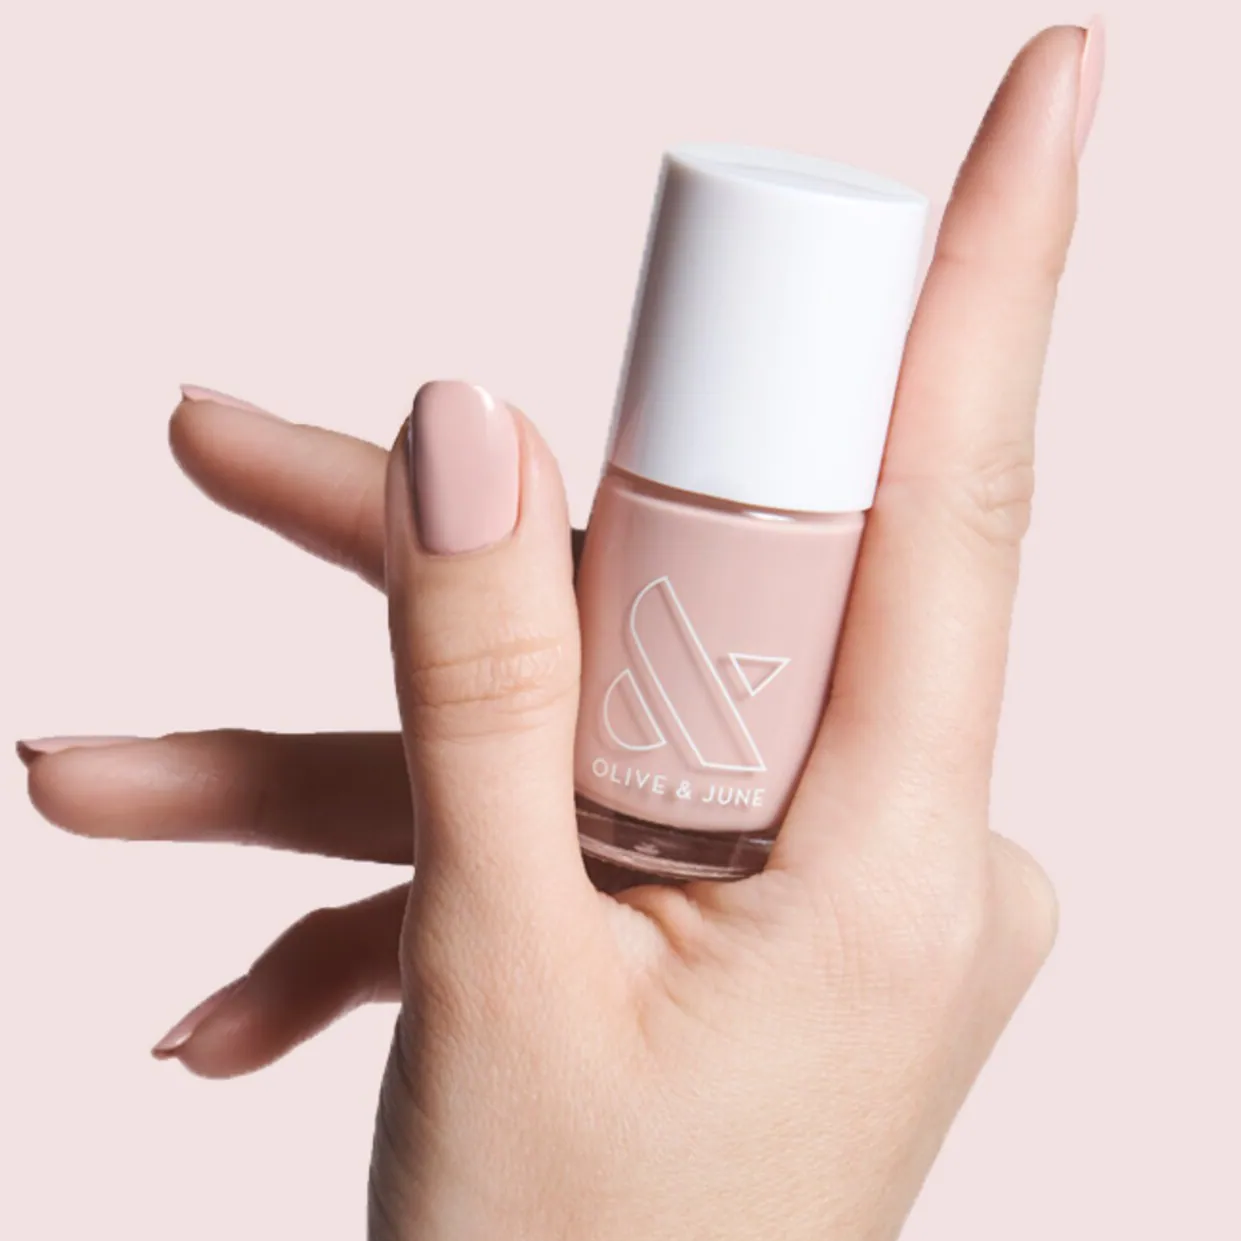
GEL NAILS
Gel nails are a type of artificial nails that most closely resembles the natural nail. Gel nails are similar to acrylic nails, as they are both made from a combination of a monomer liquid and polymer powder. The monomer liquid reacts with the polymer powder to form long polymer strands.
- The first step to a beautiful gel mani is shaping your nails. Use a nail clipper to trim them to the size and shape you want, then use a nail file to round out the edges for smooth application.
- Hydration is key for nail health. You should be using cuticle oil daily, but particularly in combination with gel polish. Use a cuticle pusher to push your cuticles back and make more of your nail visible. Use it to also remove dead skin from your nail plate and to help maintain even cuticles. Then, apply cuticle oil to nourish the skin surrounding your nails. One thing to be careful of is not to apply oil too late in the process. If there is any oily residue still on your nails when you apply polish, the base coat will have trouble adhering.
- Buffing your nails helps to make sure the surface is smooth for application, and primed to bond with the gel. Clean your nails thoroughly with rubbing alcohol or cleanser to allow the polish to adhere directly to your natural nail. Any impurities, such as remaining cuticle oil or dust particles, can cause the polish to lift prematurely.
- Now for your first layer of polish. Use a good gel base coat. This will ensure that the polish adheres properly and lasts as long as possible. Apply a thin coat over the whole nail, then cure each nail under a UV lamp or LED light to dry it. You’ll want to cure your base coat for at least 30 seconds to a minute before continuing to ensure that it has thoroughly dried. Also, make sure to seal the open edges, or cap the free edge, as this process is called. Capping the free edge means to paint over the edge of your nail so that this protective layer gives your nail a chip-free resistant finish. Ideally, this process should be done on each layer to ensure the strongest hold.
- Shake your polish well before application to ensure that the formula is properly mixed. Then, start on your color. Apply each layer in a thin coat all the way to the edges of the nail, being mindful not to stray onto the skin. You want to apply the gel polish as close to the cuticle as possible. If you do make a mistake, simply wipe off the stray polish before curing, so it does not dry and become harder to remove. Nail technicians recommend at least two coats of color, but the more you do, the more opaque your application. Don’t worry if the first one looks streaky -- thin layers will do the job better than thick uneven ones. Cure your polish in between each coat, placing your nails under the lamp for at least 30 seconds each.
- Once your nail color is applied to your liking, apply a top coat to ensure that the color is sealed and to give your nails that characteristic shine. It is extremely important to cover the entire nail with a top coat, and cap the edges for a perfect seal. Cure your nails one last time, for at least a minute, so you can ensure that they are perfectly dried and sealed. Sometimes gel will leave a tacky residue after curing, which you can simply wipe off with a cotton ball dipped in alcohol. Then you’re good to go!
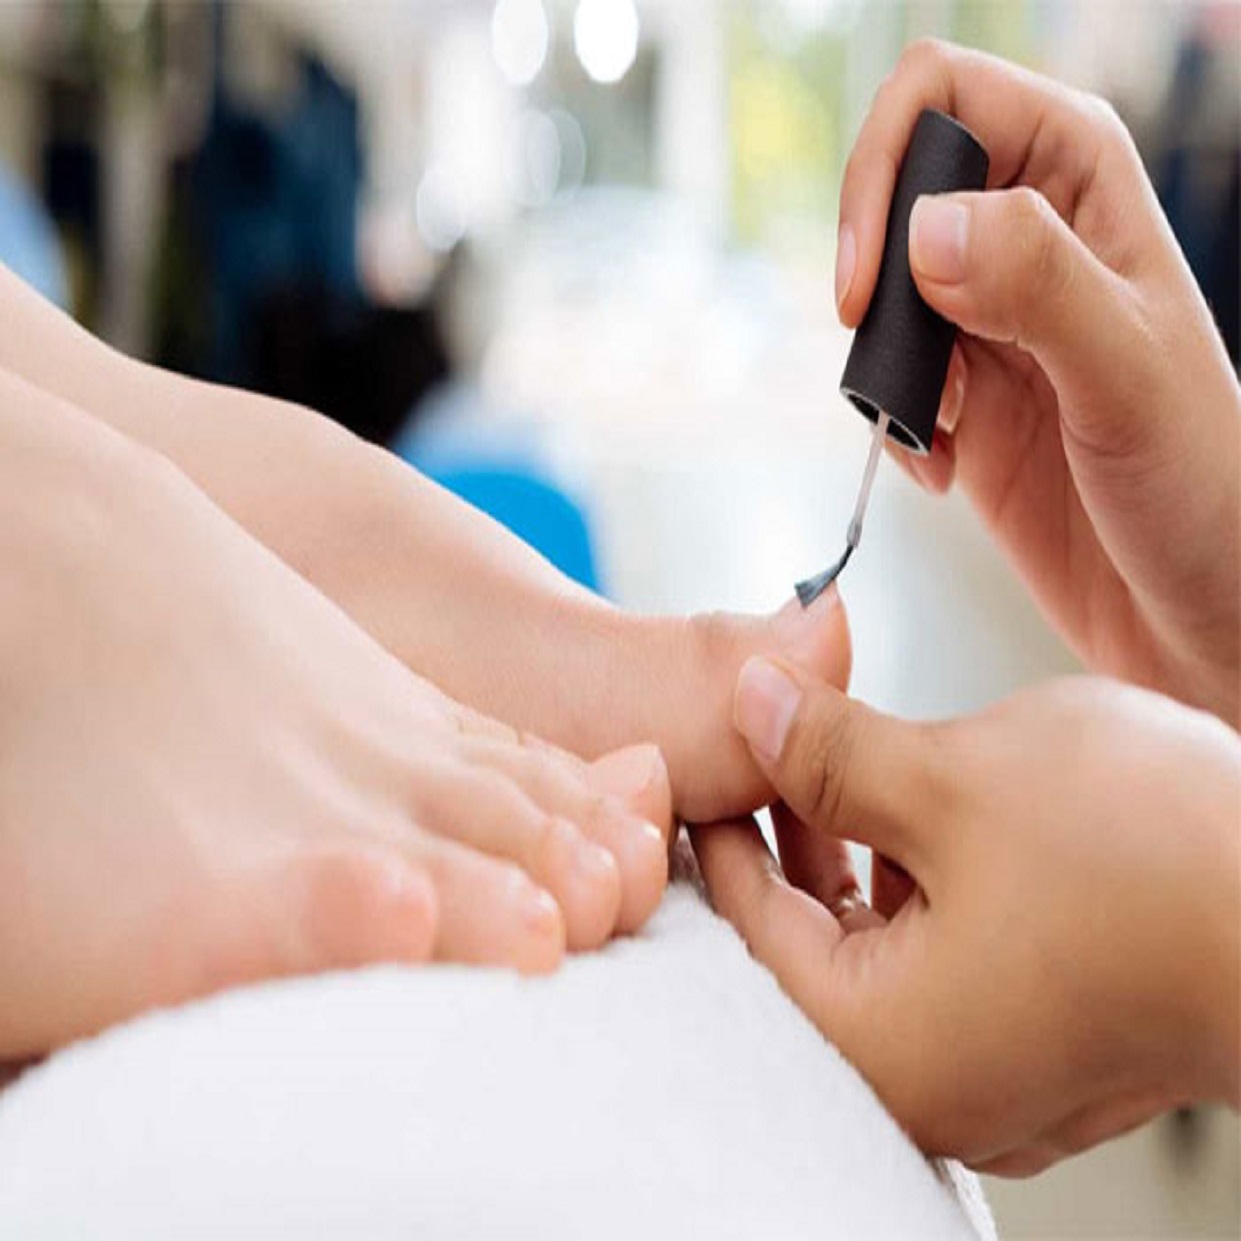
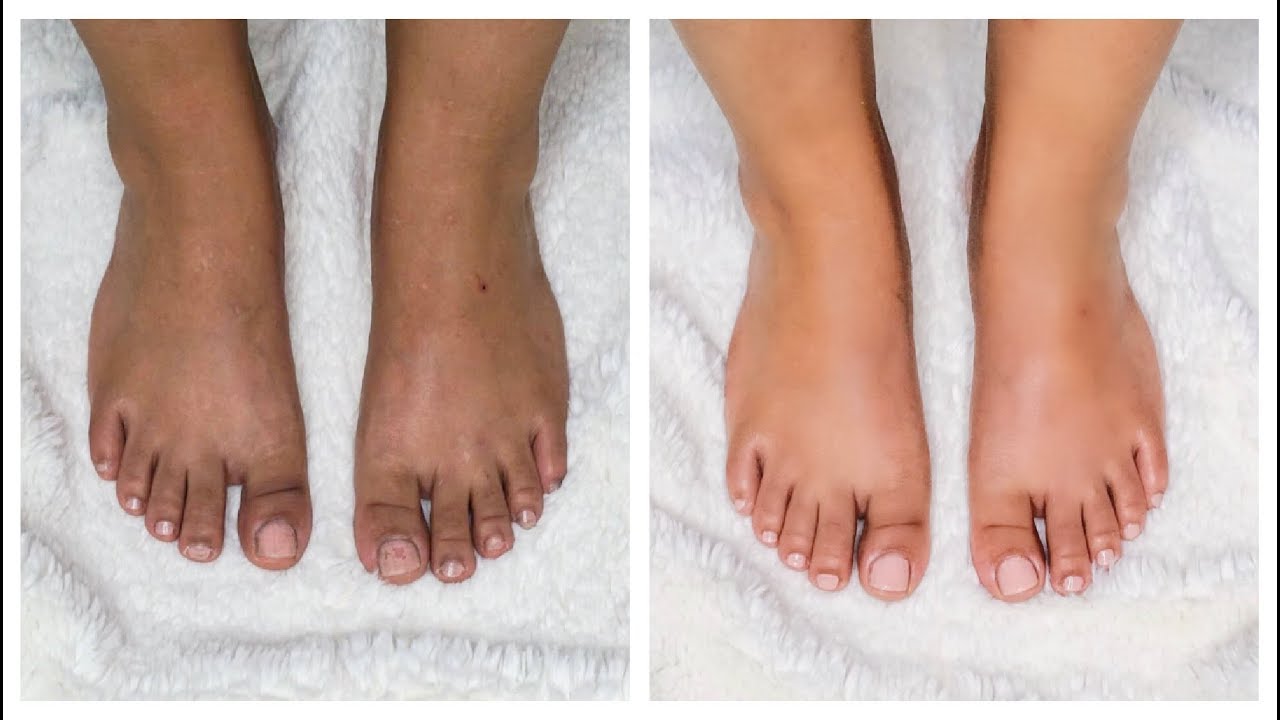
PEDICURE
A pedicure is a comprehensive treatment of your feet and is suitable for both men and women. It involves cutting, trimming and shaping your toenails, tending to your cuticles, exfoliating, hydrating and massaging your feet, and, if desired, painting your toenails.
- It might seem obvious to remove your current nail polish before starting your pedicure, but many people overlook this first step. Use a cotton ball and acetone polish remover to clear all of the nail polish off of your nails. Try your best to avoid getting too much of the acetone on your skin or cuticles as it can dry out your skin. Once you have completely removed the polish from your nails you are ready for the fun stuff.
- Fill up a basin, bowl, or foot spa with warm water. Use a bowl that you can put both of your feet into at the same time; who wants to be switching feet constantly? After you fill up the bowl with warm water, add soothing fragrances of your choice. Bubble bath mix and Epsom salts will do a lot to add to the experience, and you may even consider commercial foot soaks specifically made for pedicures. When you are done mixing the ingredients you want, dip your feet in and prepare to relax for the next 10 minutes or so. Soaking your feet softens your cuticles and makes them easier to remove.
- This next step requires either a cuticle stick or an orangewood stick which can be bought at your local beauty supply store. Remove and dry one of your feet. Gently apply and massage cuticle oil into bed of your nails. Take your cuticle stick and use it to carefully push back the dead skin. When you’re finished, rub a little more cuticle oil in and then repeat the process with the next foot. Although some salons and spas cut your cuticles during this part of the pedicure, it is not recommended that you take this approach at home. An untrained person may risk severe damage and infection when cutting their own cuticles.
- Here is where you will work on softening up those calluses so they will be easier to handle in the next step. Exfoliation helps get rid of the dead skin on the surface of your feet so that fresher, healthier skin can be brought to the forefront. There’s plenty of exfoliating foot scrubs out there for you to experiment with or you can choose make your own. When you are ready, take your scrub and use it to massage one of your feet for 2-3 minutes. Return it to the bowl and exfoliate the next foot. Rinse off all of the excess foot scrub before moving on to the next step.
- Calluses can be treated using callus stones or foot files. Scrub or file the bottom of your feet where the skin is the thickest. It is important to note that these tools should be used in an effort to smooth out the skin and not necessarily remove the callus. Calluses protect our feet and their removal can lead to painful blistering. If smoothing out your calluses starts to hurt at any point, you are going at it too hard and should either stop completely or take it easy.
- When you clip your nails clip straight across and use your file to achieve the desired shape. Don’t cut too close or you will risk an ingrown nail. When you file your nails, try to go for a square shape with rounded edges as opposed to an oval appearance which can also lead to ingrown nails.
- You’ve been working hard, so give yourself a little break and soak your feet a bit more. Pick your favorite moisturizer and massage it into your feet. You are almost done!
- Before you begin applying polish, take a cotton ball of nail polish remover and use it to remove any leftover moisturizer or oils left on your toe nails. Toe separators will make the application a whole lot easier, but if you don’t have them it’s not a problem. Lay down a base coat and wait a couple of minutes before adding your color coat. After adding your color coat you can either add another or finish off your pedicure with the final top coat. Don’t try to artificially dry your feet with a hair dryer or other technique. Relax for 15-20 minutes and your pedicure will be complete. What is better than giving yourself a pedicure? Having someone do it for you! The experts at Threads have mastered all of the techniques described above. Contact us today to schedule an appointment.
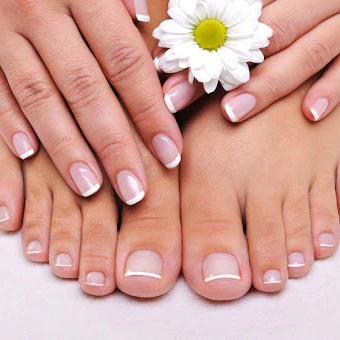
MANICURE
A manicure is a beauty treatment of the hands. Your nails will be cut, filed, and shaped. You will then have your cuticles pushed back and tidied, and then enjoy a hand massage. The final step will be the painting of the nails with a colour of your choice.
- Make sure they are completely dry (filing wet nails can cause splitting). Rounded nails (mirroring the shape of your cuticle) that extend just over the edge of the fingertip always look elegant.
- Apply a rich hand cream. Then, soak your nails in warm, soapy water for five minutes to soften the cuticles. (One hand at a time if you want to flip through a magazine or play with your iPad.)
- Push back your cuticles with a wet nail stone. If you have a hangnail, trim it; otherwise, don't clip cuticles (they protect nails from infection).
- It helps the color go on smoothly and last longer. Try OPI Natural Nail Base Coat. Or, if your nails have ridges, Essie Ridge Filling Base Coat.
- Brush on two thin coats of color, waiting a couple of minutes after each hand. Use three strokes on each nail—on either side of the nail, then a swipe of color across the tip to prevent chips.
- Singleton likes CND Air Dry, which helps cut drying time. Don't forget to swipe the top coat across the top of each nail as well, as you did with the color.
- Clean up any color outside the edges of your nails with an orange stick wrapped in a thin layer of cotton and dipped in polish remover.
Services
Nail Extensions
Gel Nail Paint
Pedicure Services
Manicure Services
Details
Nail Extentension
Nail extensions involve the addition of an artificial tip to the tip of your nail to increase the length. The appendix is then strengthened by covering it in gel, acrylic, or fibreglass. On the other hand, the artificial nail may also be affixed over your natural nails; therefore, bypassing the usage of the nail tips.
Gel Nail Paints
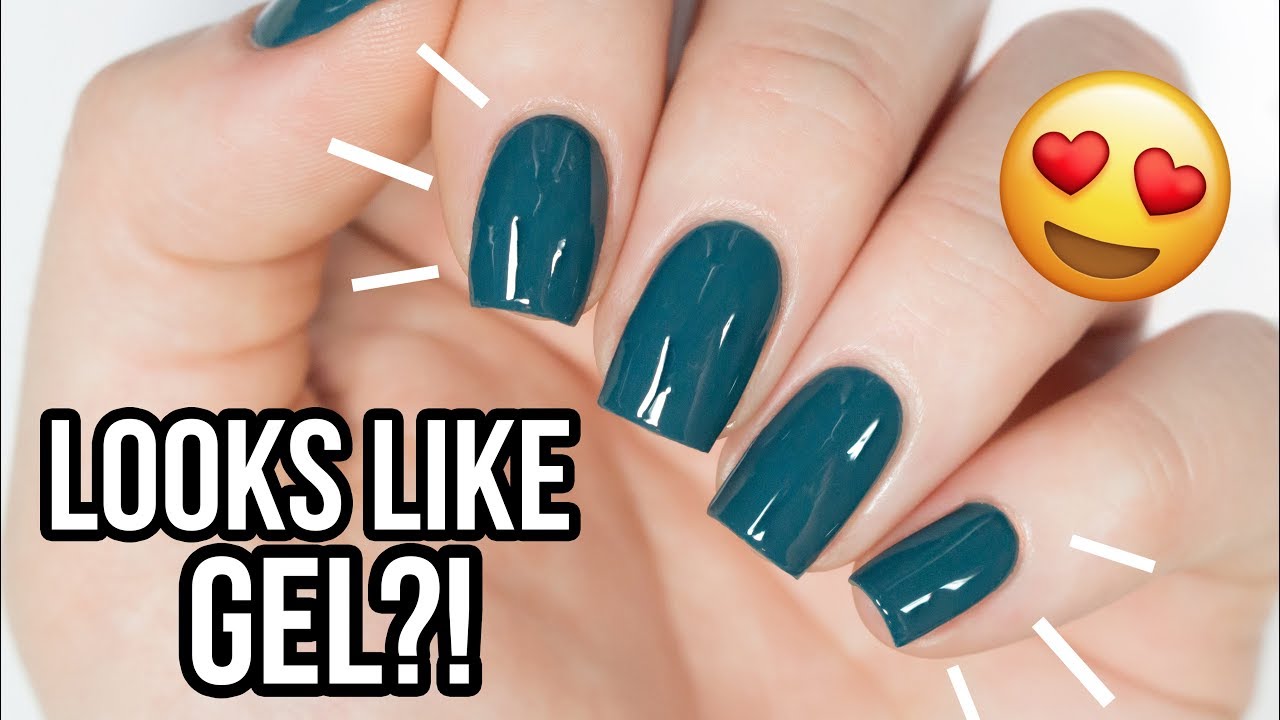
OPI's gel nail polish is officially called “GelColor Soak-off Gel Lacquer” and in short, a gel manicure is a coat of colored gel that looks deceptively similar to nail polish. It's a thin brush-on formula, designed for high performance and a glossier finish than regular nail polish.
Pedicure
A pedicure is a comprehensive treatment of your feet and is suitable for both men and women. It involves cutting, trimming and shaping your toenails, tending to your cuticles, exfoliating, hydrating and massaging your feet, and, if desired, painting your toenails.
Manicure

A manicure is a beauty treatment of the hands. Your nails will be cut, filed, and shaped. You will then have your cuticles pushed back and tidied, and then enjoy a hand massage. The final step will be the painting of the nails with a colour of your choice.